Showing posts with label classroom. Show all posts

Friday, October 3, 2014

Handmade Whiteboard Erasers!

And so begins my attempt to actually post about some cool things I've been working on...well, at least I think they're cool...and this one wins teenager seal of approval!  (A very hard thing to earn indeed ;)

Somewhere, and I forget exactly where, I got the notion of using flannel as a whiteboard eraser.  I use little individual whiteboards in my classrooms.  Recently, I've found myself having students use "big" versions of the showerboard whiteboards for group work.  And, I've started using those old printable transparency sheets as cover sheets so that students can "write on" my multiple choice tests without actually writing on them!

All of these things seem pretty popular with my students, but they left my little erasers (essentially felt glued to a piece of wood) really, really disgusting!  So, it was time for a change.

Washable flannel whiteboard erasers!  No more waste...and they're cute and cuddly.  My students love them.

To make your own:
Cut long strips of flannel 6.5 inches wide, fold right-sides together hot-dog style, and sew a 1/4" seam to create a really long tube.   Press the seam open down the center of the tube and trim to 5" long.

Chain sewing, sew across the bottom of each.  Be sure to backstitch at the beginning and end of each pocket.  Cut the threads, turn right side out, and you'll have these :)

Chop up scraps with a rotary cutter...
 Until they look like this..
By the way...chopping up the scraps was fun for awhile...as I dug through the waste I was reminded of lots of old projects.  However, if you're going to make a class set of these, I recommend doing your wrists a favor and chopping over an extended period of time.

Gather the scraps in a bowl.

Use your scraps to stuff your pockets.  Pack the filling in there pretty good because the kids will take the loft out of them once they get their hands on them.

Use clips or pins when you turn the edges under.  I just did this by hand.

Once you have a bunch queued up, sew a straight seam close to the edge.  Don't forget to backstitch!

Et voila!  (As my French-speaking husband would say)  Your erasers are complete! 


Please comment or share pictures if you make your own :)

Wednesday, February 19, 2014

Why do we create?

I was thinking about this question a lot today...what is it that makes us LOVE to create? To keep coming back to it even when we've been frustrated by a project or busy with every other task on our to-do lists?

I don't really have much of an answer, but as I watched a bunch of worn-out, chatty students dive into a DNA origami project that involved coloring nucleotides (one student deemed it "color-by-chemical") I knew it was a universal trait.  I've never seen such a happy group of students--these are brilliant ninth graders, their work could pass for senior work most of the time--but, they're kids, and they love to color.  Some of them even came to study hall today just to finish (we're supposed to finish in class on Friday.  But they get to choose their afternoon activity, and they chose to come color and fold paper--it warms my heart.)

Meanwhile, I passed the time during their test knitting up the second in a pair of socks.  My love of knitting is keeping me sane during test days.  I want to keep my eyes on them so that they aren't tempted to let their eyes "wander," but I'm just not cut out to stare students down for four hours a day two days in a row. 

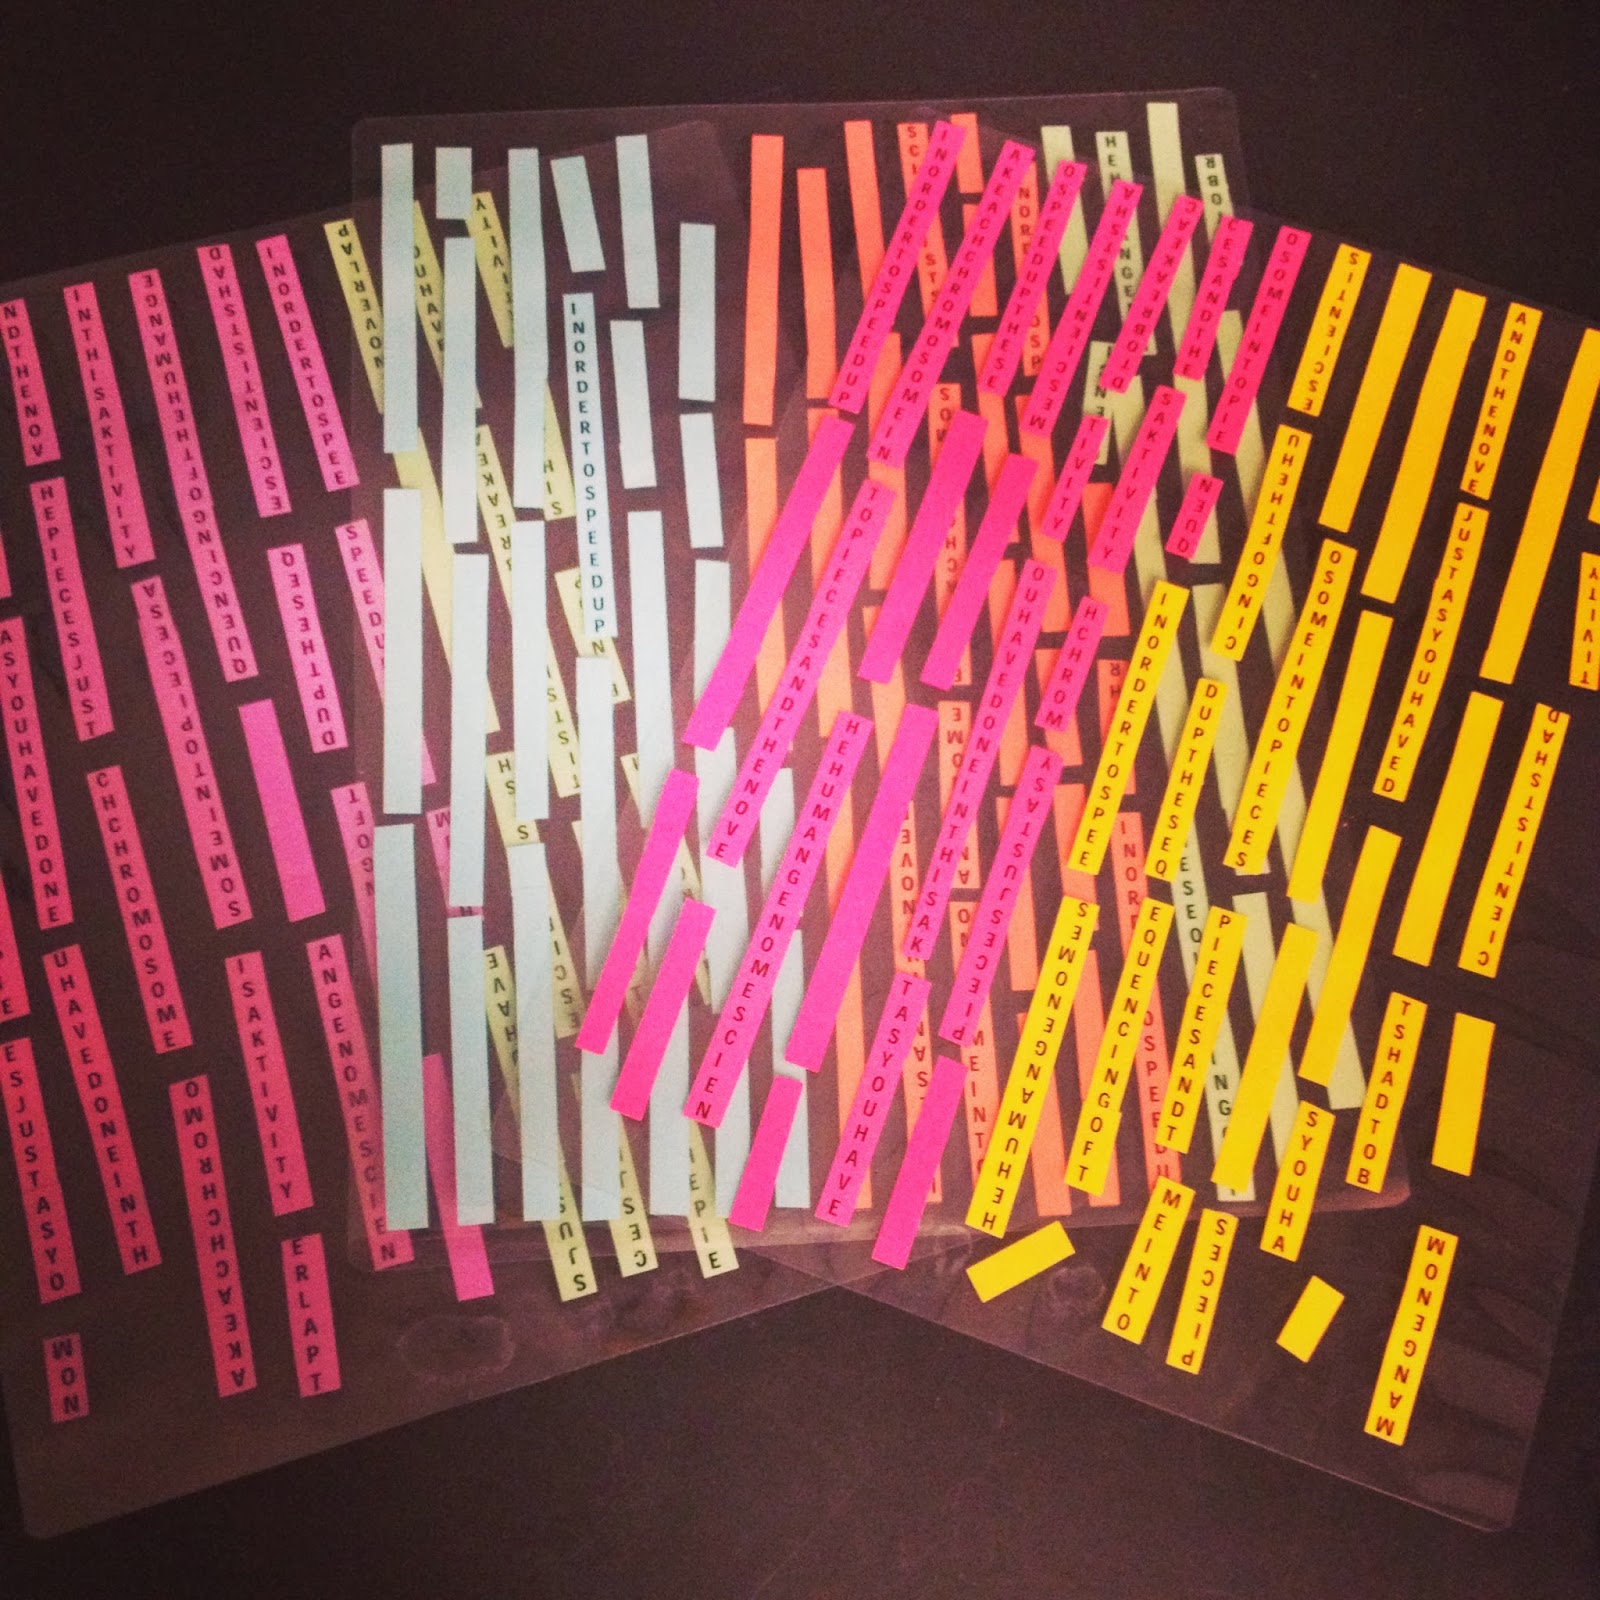
I also dove into yet another project requiring tedious cutting and pasting.  I love finding new classroom activities that require massive amounts of prep.  This is a DNA sequencing activity, requiring many segments of "code" all cut to different lengths.  Tedious yes, but there's really nothing else I'd rather be doing while monitoring a study hall.
Cutting the strips and gluing or taping them into one continuous sequence.
Laminated "sequence" ...enough for 6 groups.
So what is it that makes us love to create?  Is it using "dead" time for something productive?  Is it knowing you made something beautiful, enchanting, cool or amazing?  Does it free our minds from worry?  Is it the desire to make something for someone else--to be able to hand over love or care in the form of a tangible object?  Is it an exciting endeavor, a workout for your brain? 

It does all of these things for me.  What's it do for you?

Tuesday, August 28, 2012

More relaxed...

...with every passing day.

Each minute spent at my new school seems to be having a calming effect on me.  Normally, as school gets closer, I cannot free my mind for a moment from the swarming thoughts of children incoming.  It's not exactly worry, more of an overwhelming, consuming crush of new ideas, inspiration, hopes, and dreams.  One cannot help but think about one or another aspect of teaching.  Now, approaching the middle of the week of "teacher workdays" (read: overlapping meetings mixed with prep time when you can find it), I'm feeling a bit less worried, a bit more confident, and (a great relief to me) more and more able to enjoy my time at home with my new hubby!

I've tried to sew a little each day.  Mainly I've worked on projects for school (I can justify spending time on those easiest!), but soon I'll be back to quilting the charity quilt and the bunny quilt.


I've made some quilty labels...I liked the idea of labeling the parts of the room with animals instead of group numbers.  And my awesome sister-in-law gave me the idea of posting the scientific names of the animals along with them.  And so I give you:
Loxodonta africana


Chelonia mydas


and Hypsypops rubicundus


They're so fun!  The dolphin, snail, and salamander are in cue to be quilted.

I even think my stitches are getting a bit more even:

I also felt like my room of mismatched furniture--we're about to undergo renovation and will have a BEAUTIFUL building with new furniture--needed a facelift.  So I made a ruffle curtain.  Anyone else hate attempting to sew really long, straight seams???


I love that you can hide things behind it...invented storage!

I also love the curtain because when people walk into my room I can figure out if they love craft or not based on their response to the table ;)

I've also done a lot of knitting while listening to guest speakers...

I'm linking up to WIP Wednesday; there's always such great inspiration to be found there.  I hope to write again soon!

WIP Wednesday at Freshly Pieced

Thursday, August 23, 2012

Trying Echo Quilting--New Classroom Project

In honor of freshman Bio, and because I felt like making more cute cartoon quilted animals after the bunnies, and because I need practice echo quilting...I have a new project...

I came home and drew up some designs:


Then used Pellon's Wonder Under fusible to prepare the pieces after tracing them on my lightbox (aka our windows).

All the pieces are fused:

And the turtle is quilted and ready for binding.

I am even okay with the way the back turned out!

I'm so glad I decided to do this...it'll make great little breaks (and FMQ practice) as I work like crazy to get the classroom and plans ready!!!  I really love that it's almost all made with scraps from my grandmother (in law) that really helped inspire me to start quilting.

I'm linking up with TNT Thursday at Happy Quilting by Melissa.  Her blog is great; be sure to check it and the other projects out!

Tomorrow is my first day on site at my new school.  I'll meet other new teachers and some of the staff.  I'm nervous and excited!!!  I really want this school to be my home for a long time!

Thursday, August 9, 2012

Steph's Surprise! Cute Cork Board Tutorial

So my students and my sister both love my "cork board." (I forgot to take a picture with all my students' cute stuff...I was moving out)

Here's how to make it:

1.) Gather all your materials: (1/2 yard cuts of fabric)  A 1/2 yard is enough to do a pack of four 12x12 cork squares...but I always use multiple colors!
 2.) Cut the cork board into 2 inch strips.
3.) Tack pairs of cork strips together with hot glue.  I use six dots around the edges.
4.) Cut (or tear) your fabric into approx. 4x14" pieces.  I tore a 14" piece off the 1/2 yard cut, then cut it into 4.5" pieces.  I like tearing...it's a welcome change from very detailed quilt cutting.
5.) Anchor both long sides.  Be careful not to burn yourself and do the second side in stages if you want time to pull the fabric taught.
6.) Fold the corners of the ends in and glue in place.
7.) Clean up any hot glue strings and threads and repeat until satisfied!
I use Command brand poster strips to hang these on the wall...one on each end with the tabs sticking out.  You can attach them any way you want!

I'm linking up with T.N.T Thursday since this is my first stab at a crafty tutorial :)